What matters in 2026: For 2026, treat a roof ladder hook as safety-critical hardware, not a casual DIY shortcut. If you cannot verify the material strength, wheel placement, and fasteners, buying a rated roof hook is the safer choice.
Safety note: OSHA guidance still emphasizes using portable ladders on stable, level surfaces, maintaining three points of contact while climbing, and setting extension ladders at a safe angle. Treat this guide as general information, not a substitute for the ladder label, manufacturer instructions, or job-site safety rules.
Table of Contents
Possible Introduction
And so, it’s finally time to tackle that roofing project that you’ve been avoiding for a while. Whether it’s patching up a broken part of the roof, replacing shingles, or even starting from scratch, there are some essential tools that you are going to need to be able to access the roof safely and effectively. One of the key tools for roofing work is the ladder. While it may seem that a standard How Tall of a Ladder Do You Need for a Two-Story House? 2026 Guide enough to reach the roof, it can be unstable and ill-equipped to reach all parts of the roof. That’s where specific roofing ladders come in. They allow you to access all parts of the roof safely by having one part of the ladder grip the peak of the roof for stability. This ensures that the ladder won’t slide when being used and it gives you the ability to access more areas of the roof.
The issue is that roofing ladders can cost anywhere from $150-$300 at a hardware store, which is unnecessarily expensive for a simple repair. That’s where the DIY roofing ladder hook comes in.
In this article, we are going to show you step by step how to convert a standard 12-foot ladder into a well functioning roofing ladder so you can finish your project with materials that you can find around your home.
Instead of going to the store to buy a roofing ladder, it is possible to find a solution with materials that you can find around your own home. Using a standard 12-foot ladder, even one that may be bent or broken, you can make a ladder hook that will grip the peak of the roof and make it easier to work on repairs to your roof. In this tutorial, we will show you how to make a DIY roofing hook out of cheap and recycled materials.
Materials
One Standard 12 Foot Ladder
Two Long Plywood Boards
Four Short Plywood Boards
Two Clamps
Drill
Screws
Protractor
Measuring tape
Directions
Step One
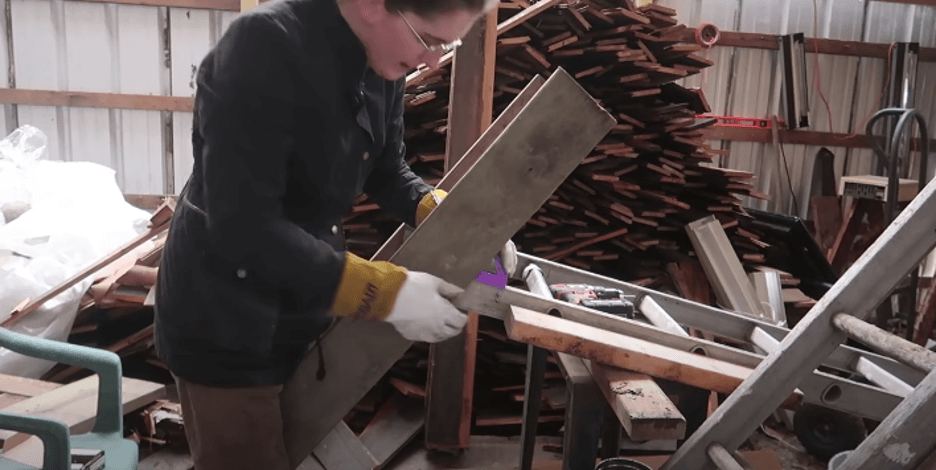
Once you’ve collected all of your materials, the first thing that you are going to do is to take the two long wooden boards and lay them both side by side. While the length of these two boards can be varied, the important part is that they are the same length and the same width.
Now you are going to use a measuring tape to measure ⅔ of the wooden board. With a pen or pencil, mark both pieces of wood so that they are even when it comes time to fix them to the ladder.
Step Two
Take one of the boards that you have just measured and place it on the outside of the ladder. In this step, you want the longer end of the wooden board to be facing down and the shorter end to be facing up as shown in the image below. If it is helpful for you, this could be a good moment to use one of the clamps to secure the wooden board to the ladder before you move onto the next step.
Step Three
Next, you are going to drill one screw into the board to fix the board to the ladder. The screw should go through both the ladder and the board as shown in the photo below. In this step, it is okay if the wooden board is straight instead of at an angle. In the next steps, we are going to see how to angle the wooden board and secure it to the ladders. As a helpful tip, having a magnet attached to your glove can make access to your screws and drill bits easier as you build your roofing hook.
Do the same for the other side so that both of your long wooden boards are fixed to the ladder. In this step it is better to just use one screw, however, later there will be time to reinforce the ladder hook with more screws.
Step Four
Now that you have both of your boards fixed to the ladder, it’s time to use the protractor to angle the boards so that the ladder hook will fit onto the top of the roof that you are working on. If you don’t have a way to measure the angle of your roof, you can estimate the angle and adjust it later if you need to. Move the boards so that they are at the correct angle. The important part about this step is that both boards are fixed at the same angle. If this isn’t done correctly, then the ladder will be unstable once it is placed on the roof.
Step Five
Once you have the angle that you want to use for your roofing hook, you can now secure the ladder hook to the ladder using two of the smaller pieces of wood. Using a clamp, you are going fix the smaller board to the inside of the piece that you just screwed into the ladder and then angle it so that it rests against the inside of the ladder as seen in the photo below.
Step Six
Using the drill, you are going to connect the two pieces of wood by drilling one screw into the top of the longer board into the smaller board. Keep the clamp fixed to the wood so that you can keep the angle that you need in order to complete the next step.
Step Seven
Now that you have the two boards fixed to each other, you are going to connect the wooden piece to the ladder by drilling a screw through the ladder into the board. It’s important in this step that the wooden board is on the inside of the ladder so that the roofing hook is stable.
Follow the same steps for the other side. In the end, the ladder hook should look something like the photo below.
Step Eight
At this point in the process, the ladder hook is taking shape but it is still unstable. In order to stabilize the ladder hook, it is important that you reinforce the structure with a wooden board connecting the two sides of the ladder hook. For this piece, you want to put one of the smaller boards closer to the top point of your ladder hook as shown in the photo below. Using one of the clamps, find the place where you want to add your additional wooden piece and clamp it into place. Using the drill, screw in the wooden board to the frame on both sides. Now the ladder hook is stronger and should feel more sturdy when it is moved.
Step Nine
Now that you have the top part of your ladder hook reinforced, it’s time to reinforce the bottom. Taking your second wooden board, screw the board at the end of your roofing hook. While this will help How to Tie Off a Ladder Safely: 2026 Guide, it will also help to protect your roof when it comes time to move your roofing ladder. By putting the reinforcement on the bottom, the weight of the two boards is distributed causing the ladder to put less pressure on the roof and easier to move along the roof as you need to make adjustments.
Step Ten
At this point, your DIY roofing hook is almost finished! The last step is to add more screws to the parts of your ladder hook that don’t feel securely fashioned. Try moving the ladder hook to see if there are any parts of the ladder hook that move. In those places, add another screw and then see if the ladder hook feels more secure. If it still doesn’t feel stable, then you can try to add smaller boards connecting the two sides of your roofing hook. Once it feels secure enough, it’s time to bring it up to the roof and give it a try!
Step Eleven
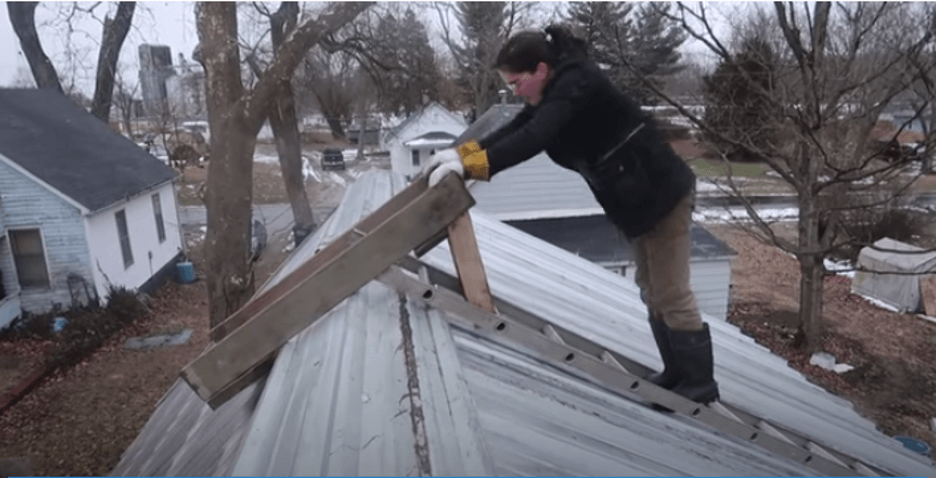
Now it is time to test the roofing hook that you have just made. Carry the ladder to the roof, the easiest way to get it to the top is by lifting it up and then lowering the ladder hook into place at the very top of the roof. If it is not possible to hold the ladder in the air, then it is possible to slide the roofing ladder up as shown in the photos below. This can be tricky because of the peak of the roof. If the ladder falls, try to move the ladder until it falls into place at the peak of your roof.
Now that you have the roofing hook securely placed at the top of the roof it is possible to do the repairs that you need to do safely and with ease! Now you can move the ladder across the top of the roof just by sliding it across the roof and then climb up and down the ladder as needed.
Good luck with your project and I hope you enjoyed this tutorial on how to make a DIY Roofing Hook!